
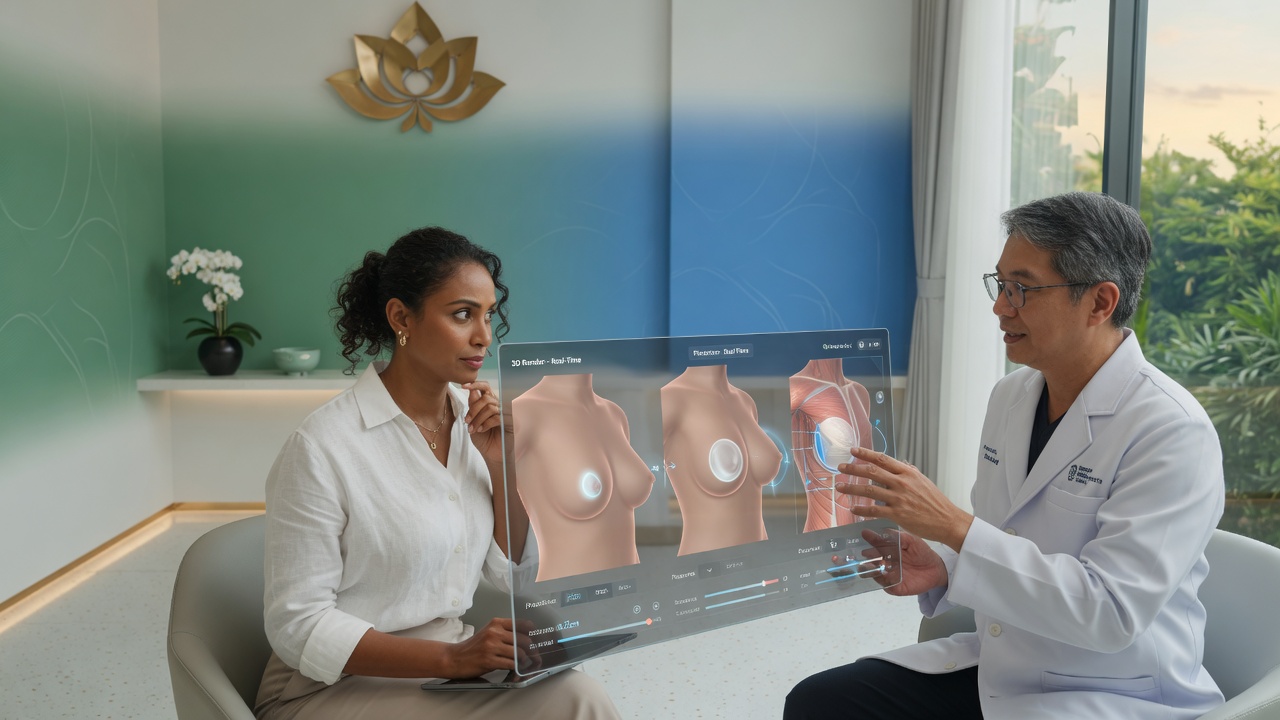
The Complete Guide to Breast Augmentation in Thailand: Types, Incisions, Risks, Recovery & Choosing a Clinic
You’ve done your research on breast augmentation. You know the basics—implants, surgeons, recovery. But now you’re facing the real decisions: silicone or saline? Under the muscle or over? Which scar is best? Choosing the right clinic in a foreign country adds another layer of complexity. Without a clear plan, you risk ending up with results you regret—unnatural appearance, higher complication risks, or a longer, more painful recovery. By the end of this guide, you’ll have a complete decision‑making framework to confidently choose your implant type, incision, surgeon, and recovery plan so you can achieve beautiful, safe, and long‑lasting results. We’ll start by comparing implant types and sizes, then walk through incision options and placement techniques, discuss potential risks and revision surgery, outline a day‑by‑day recovery plan, and finally, show you how to select the right clinic in Thailand.
Medical Disclaimer: This content is for informational purposes only and does not constitute medical advice. Consult with a qualified plastic surgeon for personalized guidance.
Key Takeaways
A successful breast augmentation in Thailand requires a balanced decision across four key areas: implant type, incision, surgeon, and recovery plan.
- Silicone implants offer a more natural feel and are the most popular choice, but require longer incisions.
- Submuscular placement significantly reduces the risk of capsular contracture compared to subglandular placement.
- Capsular contracture is the most common long-term complication, affecting up to 20% of patients within 10 years.
- Thailand offers world-class clinics with JCI accreditation at 40-70% lower costs than the US, but thorough due diligence is essential.
Breast Implant Types and Sizes: Choosing What’s Right for You
The two primary types of breast implants are silicone and saline, each with distinct advantages in feel, safety profile, and application. According to leading plastic surgeons, over 80% of breast augmentations in the US are now performed with silicone gel implants due to their natural texture and lower risk of visible rippling. Choosing the right implant type and size is the single most impactful decision you will make for your final aesthetic outcome and long‑term satisfaction.
Silicone vs. Saline: A Detailed Comparison
Silicone gel implants are pre‑filled with a cohesive gel that closely mimics the feel of natural breast tissue. They are less prone to visible rippling and provide a more natural look, especially in women with thin skin or minimal breast tissue. However, they require a longer incision (3–4 cm) for placement, and a silent rupture can go unnoticed—regular MRI monitoring is recommended starting at 5–6 years post‑surgery.
Saline implants are inserted empty and then filled with sterile salt water. This allows for a smaller incision (2–3 cm) and minor size adjustments during surgery. A rupture is immediately detectable because the implant deflates. On the downside, saline implants often feel less natural and carry a higher risk of visible rippling, particularly in thinner patients.
| Feature | Silicone Implants | Saline Implants |
|---|---|---|
| Feel | More natural, like breast tissue | Can feel less natural, more watery |
| Incision Size | Larger (3–4 cm) | Smaller (2–3 cm) |
| Rupture Detection | Silent – requires MRI to detect | Immediate – deflates visibly |
| Rippling Risk | Lower | Higher, especially in thin women |
| Cost | More expensive | Less expensive |
| FDA Approval | Approved for augmentation in women 22+ | Approved for augmentation in women 18+ |
The FDA official page on breast implants classifies and monitors both types, detailing their respective risks and long‑term monitoring requirements (2024). Your choice should factor in your body type, desired feel, and willingness to undergo routine imaging.
The type of implant is only the first step. The shape—round or anatomical—is the next critical decision that will determine the silhouette of your final result.
Implant Shape: Round vs. Anatomical (Teardrop)
Round implants are the most common choice. They provide uniform fullness at both the top and bottom of the breast, creating enhanced cleavage and upper‑pole fullness. Because they are symmetrical, rotation is not a concern. They are ideal for women who want a noticeable “lifted” appearance or who have some natural breast tissue to cover the implant.
Anatomical (teardrop) implants are shaped to mimic a natural breast slope—more fullness at the bottom, tapering at the top. They cost more and almost always require a textured surface to prevent rotation. However, textured implants have been linked to a rare lymphoma called BIA‑ALCL (breast implant‑associated anaplastic large cell lymphoma). The FDA safety communication on breast implants cautions against their use unless medically necessary (2023). Teardrop implants work best for women with very little natural breast tissue who desire a natural slope without upper‑pole fullness.
Key Decision Factors:
- If you prioritize upper‑pole fullness and cleavage → Round.
- If you have very little breast tissue and want a natural slope → Teardrop (with textured shell).
- If you are athletic with strong pectoral muscles → Teardrop may appear more natural under the muscle.
Once you have chosen your implant type and shape, the final—and most impactful—decision is the size. An implant that is too small or too large can be a source of long‑term dissatisfaction.
How to Choose the Right Implant Size
Choosing the correct size is not about picking a cup letter—it is a biometric decision based on your chest wall width, existing breast volume, skin elasticity, and desired look.
Body Anatomy Factors:
- Chest Wall Width: The implant base diameter should roughly match the width of your natural breast. You can approximate this by measuring the distance from your sternum to your armpit.
- Natural Breast Volume: Women with more natural tissue (B cup or larger) can typically accommodate larger implants. Those with minimal tissue (A cup) may need smaller implants to avoid an unnatural appearance.
- Skin Elasticity: Younger women with good elasticity can stretch to accommodate larger implants; older skin may not retract as effectively after large implants.
- Desired Look: A “natural” result usually means a 1–2 cup size increase; an “enhanced” look means 3+ cups.
The “Rice Test”:
A practical at‑home method to estimate volume: fill a ziplock bag with rice in increments of 50 cc, place it inside a sports bra, and observe the size in a mirror. This gives a three‑dimensional sense of the projected volume.
Size Selection Example Based on Body Frame:
- If you have a narrow chest (28–30‑inch band) and currently wear a 34A, a 250–300 cc silicone implant is often recommended for a natural B‑cup result.
- If you have a wider chest (36–38‑inch band) and wear a 36B, a 350–400 cc implant may be needed to achieve a noticeable increase to a full C or D cup.
A 2021 study in PubMed found that 92% of women were satisfied with their results, with size‑related dissatisfaction being the most common reason for secondary surgery (2021). Your surgeon should use 3D imaging or sizers during your consultation to confirm the ideal volume.
Once you’ve chosen your implant, the next major medical decision is the surgical approach itself.
Incision Types and Implant Placement: Making the Right Choice
The incision site and implant placement work together to determine how your final result looks, how visible your scars will be, and your recovery experience. Three primary incisions are used in breast augmentation, and three main placement options exist. The Balanced Beauty Framework—weighing aesthetics against safety—applies directly here, because choosing a hidden scar may trade off against surgical precision.
Inframammary (Breast Crease)
The inframammary incision is made in the natural crease under the breast. It is the most common and most versatile approach. Advantages include excellent access for the surgeon, precise pocket creation, compatibility with all implant types and placement techniques, and a scar that is hidden in the natural fold when standing. Disadvantages are limited to the fact that a scar exists, though it fades well over time. It is best for most patients, especially those choosing silicone or anatomical implants. A Cochrane systematic review found no significant long‑term outcome differences among inframammary, periareolar, and transaxillary incisions, though each has distinct scar and risk profiles (2021).
For patients who are most concerned about avoiding any scar on the breast itself, the transaxillary approach offers a compelling alternative.
Transaxillary (Armpit)
The transaxillary incision is made in the armpit fold, leaving no visible scar on the breast. This makes it popular among patients who prioritize a completely scar‑free result. However, it has important limitations: it can only be used for submuscular or dual‑plane placement (not subglandular), and it is generally restricted to saline implants because silicone implants are too large to pass through the armpit via an endoscope. The technique is more difficult for the surgeon and may result in less precise pocket creation, potentially leading to asymmetry. It is best for patients who want a scar‑free breast and are willing to accept saline implants.
The third option, the periareolar incision, is less commonly used today, but it remains a viable choice for select patients.
Periareolar (Nipple Edge)
The periareolar incision follows the border of the areola. It can be well‑hidden at the color transition line, and it provides good access for minor revisions (e.g., areola reduction). Disadvantages include a higher risk of loss of nipple sensation, potential for asymmetrical scarring, possible interference with breastfeeding, and difficulty placing large implants. It is not recommended for patients with small areolas. Best for patients with larger areolas who are also planning an areola reduction.
Once the incision site is chosen, the second critical decision is where to place the implant relative to the chest muscle. This decision has a significant impact on recovery time, complication risk, and final look.
Subglandular vs. Submuscular vs. Dual Plane Placement
Subglandular (over the muscle): The implant sits on top of the chest muscle, behind the breast gland. Advantages include shorter recovery, less post‑operative pain, and more upper‑pole fullness. Disadvantages include a higher risk of capsular contracture (up to 12.1%), more visible rippling (especially with saline), and a less natural look in thin women. Best for women with enough natural breast tissue to cover the implant or for bodybuilders who cannot tolerate a longer recovery.
Submuscular (under the muscle): The implant is placed beneath the pectoralis major muscle. Advantages include a significantly lower risk of capsular contracture (4.2%), a more natural appearance (the muscle provides upper‑pole coverage), and better visualization on mammography. Disadvantages include longer recovery, more post‑operative pain, possible animation (implant movement when the chest muscle is flexed), and sometimes less upper‑pole fullness. Best for most patients, especially thin women with minimal breast tissue.
Dual Plane: A hybrid technique where the upper part of the implant is under the muscle and the lower part is over it. Advantages combine the lower capsular contracture risk of submuscular placement with the upper‑pole fullness and animation control of subglandular. Best for women who want a naturally enhanced breast with good upper‑pole fullness and lower complication risk.
A cohort study published in PubMed reported capsular contracture rates of 4.2% with submuscular placement versus 12.1% with subglandular placement (2018). That difference alone is often enough to guide the decision toward submuscular for most candidates.
Making the right choices about implant type, incision, and placement significantly reduces the risk of complications, but it cannot eliminate them completely.
Potential Risks, Complications, and Revision Surgery
Breast augmentation is one of the safest elective cosmetic procedures, but it carries a well‑documented set of risks. Understanding these will help you plan for a successful long‑term outcome. The Balanced Beauty Framework applies here too: choosing a higher safety profile (submuscular placement, regular monitoring) may mean a slightly longer recovery, but it dramatically reduces your chance of future complications.
Capsular Contracture: Causes, Prevention, and Treatment
Capsular contracture is the most common long‑term complication. It occurs when the natural scar tissue that forms around any implant tightens and hardens, causing the breast to feel firm, look distorted, and sometimes become painful. It is the leading reason for revision surgery.
Causes: Bacterial contamination during surgery (biofilm), hematoma, seroma, implant rupture, and genetic predisposition. Subglandular placement and smooth implants are associated with higher risk.
Grading (Baker Scale):
- Grade I: Normal softness
- Grade II: Slightly firm, but no visible distortion
- Grade III: Firm and visibly distorted
- Grade IV: Hard, painful, and cold
Prevention: Submuscular placement, textured implants (though note the BIA‑ALCL link), meticulous surgical technique (antibiotic irrigation, “no‑touch” method), and immediate post‑op massage.
Treatment: Grade III/IV capsular contracture nearly always requires revision surgery—a capsulectomy (removal of the scar capsule) and implant replacement. Success rates exceed 80%, but contracture can recur.
A systematic review in PubMed found capsular contracture rates ranging from 5% to 15%, highlighting submuscular placement as a key preventive factor (2016).
Capsular contracture is one of the main reasons patients eventually consider implant replacement.
How Long Do Breast Implants Last? When to Consider Replacement
Breast implants are not lifetime devices. The FDA estimates that approximately 20% of patients will need a revision within 10 years of primary augmentation. Common reasons include capsular contracture, implant rupture (silent for silicone, immediate for saline), cosmetic dissatisfaction, and a desire for a different look.
When to consider replacement:
- Medically necessary: Rupture, capsular contracture Grade III/IV, infection, BIA‑ALCL.
- Elective: Aesthetic dissatisfaction, significant changes after weight loss or pregnancy, desire for a different size or type.
Monitoring schedule: The FDA recommends monthly self‑exams and an MRI for silicone implants at 5–6 years, then every 2–3 years thereafter to detect silent ruptures. A 10‑year follow‑up study in PubMed reported that 20% of patients underwent revision, with rupture and capsular contracture as the leading causes (2019).
Beyond capsular contracture and implant longevity, other less common but important complications can occur.
Other Complications: Rupture, Rippling, and Seroma
- Implant Rupture: Silicone ruptures are silent—only an MRI can detect them. Saline ruptures cause immediate deflation. Both require removal and replacement.
- Rippling/Wrinkling: Visible folds in the implant shell, more common with saline implants and in thin women with subglandular placement. Fat grafting can sometimes camouflage these.
- Seroma: Fluid accumulation around the implant. Usually resolves on its own, but may need drainage.
- Infection: Rare (<2%), but serious. It may require implant removal and a 3–6 month waiting period before re‑implantation.
- BIA‑ALCL: A rare form of lymphoma linked to textured implants. The FDA has restricted textured implant use. The absolute risk is very low, and most cases involve textured shells, not smooth ones. If you are considering textured anatomical implants, discuss this risk thoroughly with your surgeon.
When complications do arise, revision surgery is often the solution.
Revision Surgery: When, Why, and Options
Revision breast surgery is more complex than the primary procedure. It may involve:
- Implant exchange – removing the old implant and placing a new one.
- Implant removal (explantation) – taking out the implant without replacement, often combined with a lift.
- Capsulectomy – surgical removal of the scar capsule.
Revision carries higher risks of capsular contracture recurrence, infection, and dissatisfaction. The FDA on breast implant revision risks outlines these specific concerns (2024). Always ask your surgeon about their revision policy and costs before your primary surgery.
A successful recovery is the final, and equally important, phase of your journey.
Recovery, Aftercare, and Follow-up Timeline
The Balanced Beauty Framework reminds you that investing time in proper recovery is just as important as the surgery itself. Rushing back to normal activities can undo the best surgical work. Here is what to expect, day by day.
A Day-by-Day Recovery Timeline
| Timepoint | Status | Key Activities | Restrictions |
|---|---|---|---|
| Day of Surgery (Day 0) | In hospital/clinic | Surgery, wake up in recovery room. Begin pain medication. | No driving, no heavy lifting. |
| Days 1–3 | At home (hotel) | Rest in a reclined position. Manage pain with prescribed meds. Start light walking around the room. | No showering (sponge bath only), no reaching overhead. |
| Day 7 | First follow-up | Surgeon removes drains, checks incisions, applies new dressings. | No driving, no heavy lifting. Light walking only. |
| Week 2 | Significant improvement | Most swelling subsides. Can start sleeping on side. Light stretching. | No chest exercises. No strenuous activity. |
| Week 4 | Return to work (desk job) | Can drive short distances. Can sleep on stomach. Start brisk walking. | No upper body weight training. |
| Week 6 | Full recovery (most lifted) | Return to all normal activities. | Heavy lifting (over 10 kg) and chest exercises still avoided. |
| Month 3 | Final result visible | Implants settle into final position and shape. Scars continue to fade. | Full return to all exercise, including chest workouts. |
The WHO guidelines for safe surgical recovery emphasize structured follow‑up to reduce complications (2022). Adhering to this timeline is critical.
Managing discomfort and swelling in the first few days is a top priority for a comfortable recovery.
How to Manage Pain and Swelling
Pain management: Take prescription painkillers exactly as directed. Muscle relaxants may also be prescribed. Cold compresses (20 minutes on, 20 minutes off) help reduce swelling. Wear your compression bra as instructed—it minimizes fluid accumulation and supports the implants.
Reducing swelling: Elevate your upper body by sleeping in a reclined position. Increase water intake, reduce sodium, and take gentle walks to promote circulation. Avoid heat (hot baths, saunas), alcohol, and NSAIDs (ibuprofen) for the first 48 hours, as they can increase bleeding. By the end of the first week, most swelling will begin to subside.
While the initial pain and swelling will subside, proper scar management and follow‑up are essential for the long‑term finish of your results.
Scar Care and Long-Term Follow-up
Scar care: Once your incisions are fully closed (usually around week 2–3), start using silicone gel or silicone sheets. These have the best evidence for reducing scar thickness and discoloration. Sun protection (SPF 30 or higher) is critical for the first year to prevent hyperpigmentation. Gentle massage of the scars after week 4 can help soften them.
Follow‑up schedule: Perform monthly breast self‑exams after the first 6 weeks. For silicone implants, schedule an MRI at 5 years and every 2–3 years thereafter. See your surgeon immediately if you notice firmness, shape change, pain, or visible rippling that wasn’t there before.
Once you are fully recovered, the next step is to ensure your choice of clinic sets you up for long‑term success.
How to Choose a Clinic and Surgeon in Thailand
Thailand offers world‑class plastic surgery at 40–70% less cost than in the United States. However, not all clinics are equal. Applying the Balanced Beauty Framework at this stage means balancing cost (Thailand’s advantage) against safety (accreditation and surgeon experience). Your final result depends as much on who performs your surgery as on the implant itself.
Key Credentials and Accreditations to Look For
JCI accreditation (Joint Commission International) is the gold standard for international hospitals. It indicates that the facility meets rigorous US‑equivalent safety and quality standards. Well‑known JCI‑accredited hospitals in Thailand include Bumrungrad International Hospital, Bangkok Hospital, and Samitivej Hospital.
Surgeon credentials:
- Board certification: Look for certification by the Thai Board of Plastic and Reconstructive Surgery.
- Hospital affiliations: A good surgeon will have privileges at a major JCI‑accredited hospital.
- Experience: Ask how many breast augmentations they perform per year. High‑volume surgeons (100+ per year) typically have lower complication rates.
Package transparency: A reputable clinic will itemize the surgeon’s fee, anesthesia, hospital stay, implant cost (specifying the brand, e.g., Mentor or Allergan), medications, post‑op garments, and follow‑up visits. Avoid vague “all‑inclusive” packages that lack detail.
DCH Hospital, for example, is a JCI‑accredited facility offering transparent pricing and comprehensive care packages (2025). Write these questions down and ask every clinic you consider.
Cost is, of course, a major factor. Understanding what a package includes and how it compares is the next step.
Understanding the Total Cost and What’s Included (Package Comparison)
Breast augmentation in Thailand typically costs between $3,000 and $8,000 USD, depending on the implant type, brand, and clinic. This is 40–60% less than the average US price.
What’s typically included:
- Surgeon’s fee
- Anesthesia fee
- 1–2 night hospital stay
- Implant cost (brand specified)
- Post‑operative medications
- Compression bra
- 1–2 follow‑up visits
- Local transportation
What’s NOT typically included:
- Airfare to Thailand
- Accommodation (though many clinics offer discounted rates at partner hotels)
- Food
- Extended follow‑up (beyond the first week)
- Revision surgery (if complications arise)
| Location | Average Cost (Surgeon + Hospital + Implants) | Notes |
|---|---|---|
| Thailand | $3,000 – $8,000 | JCI‑accredited hospitals, excellent value |
| United States | $6,000 – $15,000+ | Higher surgeon fees and hospital costs |
| South Korea | $8,000 – $12,000 | Leading destination for aesthetics, similar to US |
Beauty Butler Thailand reports that costs vary widely by clinic and implant brand, so always request a written quote.
With so many options, how do you separate quality from a great deal from a potential risk?
Reading Reviews and Red Flags
Sources of Reviews:
- Clinic websites – may be curated. Cross‑reference on third‑party platforms.
- Google Reviews, Trustpilot, RealSelf – independent, though filter for verified patients.
- Social media – Facebook groups for medical tourists in Thailand are often candid and up‑to‑date.
Red Flags to Watch For:
- Unrealistically low pricing: Packages under $2,000 should raise serious concerns about implant quality or surgeon qualifications.
- High‑pressure sales: “Book now” or “flash sale” promotions are a major red flag in medical tourism.
- Vague information: A clinic that won’t clearly state the surgeon’s credentials, the implant brand, or the package breakdown is hiding something.
- No virtual consultation: A reputable surgeon always requires a consultation (in‑person or video) before scheduling surgery.
Even with the best planning, there are important limitations and alternatives to consider.
Limitations & Alternatives to Consider
When Breast Augmentation Isn’t the Answer
- Unrealistic expectations: The most common cause of dissatisfaction. A patient may expect an implant to “replace” naturally full breasts or change their entire body frame. Solution: A thorough consultation with 3D imaging can set realistic expectations.
- Active health issues: Women with active autoimmune diseases, current smoking, or very poor skin elasticity face higher complication risks. Smoking must be stopped at least 6 weeks before surgery.
- Future pregnancy or weight loss: Significant changes can alter your results. If you plan to have children or lose a large amount of weight, you may want to delay augmentation or consider a less invasive option like fat transfer.
When to Choose Alternatives
- Breast lift (mastopexy): For women with sagging breasts due to weight loss, aging, or breastfeeding. A lift corrects drooping without an implant; it can be combined with a small implant for volume.
- Fat transfer (lipofilling): For women who want a modest increase (½ to 1 cup size) and have enough donor fat (abdomen, thighs). It carries lower risk of capsular contracture, but results are less predictable and multiple sessions may be needed.
When to Seek Expert Help
If you have a history of breast cancer, previous augmentation with complications, or complex medical conditions, you must consult with a board‑certified plastic surgeon and, if needed, an oncologist before making any decisions. This is not a DIY research project.
Frequently Asked Questions
How long is recovery after breast augmentation?
Most patients can return to desk work after 2 weeks and resume all physical activities, including heavy lifting, by 6 weeks post‑surgery. The first 3 days require complete rest with reclined sleeping. Swelling and discomfort are most notable in the first week. A structured recovery timeline is critical for minimizing complications and achieving the best long‑term results.
What size implants will look best?
The ideal implant size is determined by your chest wall width, existing breast volume, and skin elasticity, not a “cup size” goal. The most common sizes for a natural‑looking result in Thailand are between 250 cc and 400 cc. Use the “rice test” at home to visualize volume. An experienced surgeon will help you choose an implant where the base diameter matches your natural breast width.
Which incision is better for breast augmentation?
The inframammary incision (under the breast crease) is the gold standard for most patients as it provides the surgeon with the best access and control. The transaxillary (armpit) incision leaves no scar on the breast but is more complex and limited to saline or smaller silicone implants. The periareolar (nipple) incision can affect nipple sensation. Your choice should balance scar preference with surgical accuracy.
How long do breast implants last?
Breast implants are not lifetime devices. The FDA estimates that 20% of patients will need a revision within 10 years due to complications (capsular contracture, rupture) or personal preference. Silicone implants require MRI monitoring every 2–3 years after year 5 to detect silent ruptures. Plan for at least one replacement surgery in your lifetime.
What is the most regretted cosmetic surgery?
Breast augmentation is often cited as one of the most regretted cosmetic surgeries when expectations are mismatched—typically when patients choose implants that are too large for their frame, leading to long‑term pain, back issues, and aesthetic dissatisfaction. Most regret is avoidable through careful planning and consultation. Properly chosen and performed augmentation has one of the highest patient satisfaction rates, with studies showing 92% satisfaction.
Conclusion: Your Path to a Safe and Beautiful Outcome in Thailand
Your breast augmentation journey in Thailand is a series of balanced decisions. By applying the Balanced Beauty Framework—weighing aesthetics, safety, cost, and longevity against your individual goals—you can achieve a beautiful, natural‑looking result with minimal risk. The right choice balances submuscular placement for lower capsular contracture risk with the implant type and incision that matches your body and aesthetic vision (PubMed, 2018; Cochrane, 2021).
The Balanced Beauty Framework reminds you that no single “best” option exists. The “best” incision is the one your surgeon is most experienced with. The “best” implant is the one that fits your body, not a “trending” choice. The “best” clinic is the one with JCI accreditation and transparent pricing.
Start your journey by researching 2–3 JCI‑accredited hospitals in Thailand. Schedule virtual consultations with their board‑certified plastic surgeons. Ask for a detailed package breakdown and a copy of their revision policy. Your confidence comes from being informed. Your beautiful result will follow.